On this page
Why bypass the AC power supply
Starlink ships with a brick meant for a wall outlet. On a battery/solar system that's wasteful: your battery is already DC, so running DC → inverter → AC → brick → back to DC burns 10–20% in conversion losses and adds boxes that can fail.
Feed DC straight in instead and you get more runtime from the same battery, fewer failure points at a remote site, and a link that rides straight through grid outages with no transfer delay. Standard practice for WISPs, off-grid homes, vans and boats — the only catch is voltage.
The DC plant
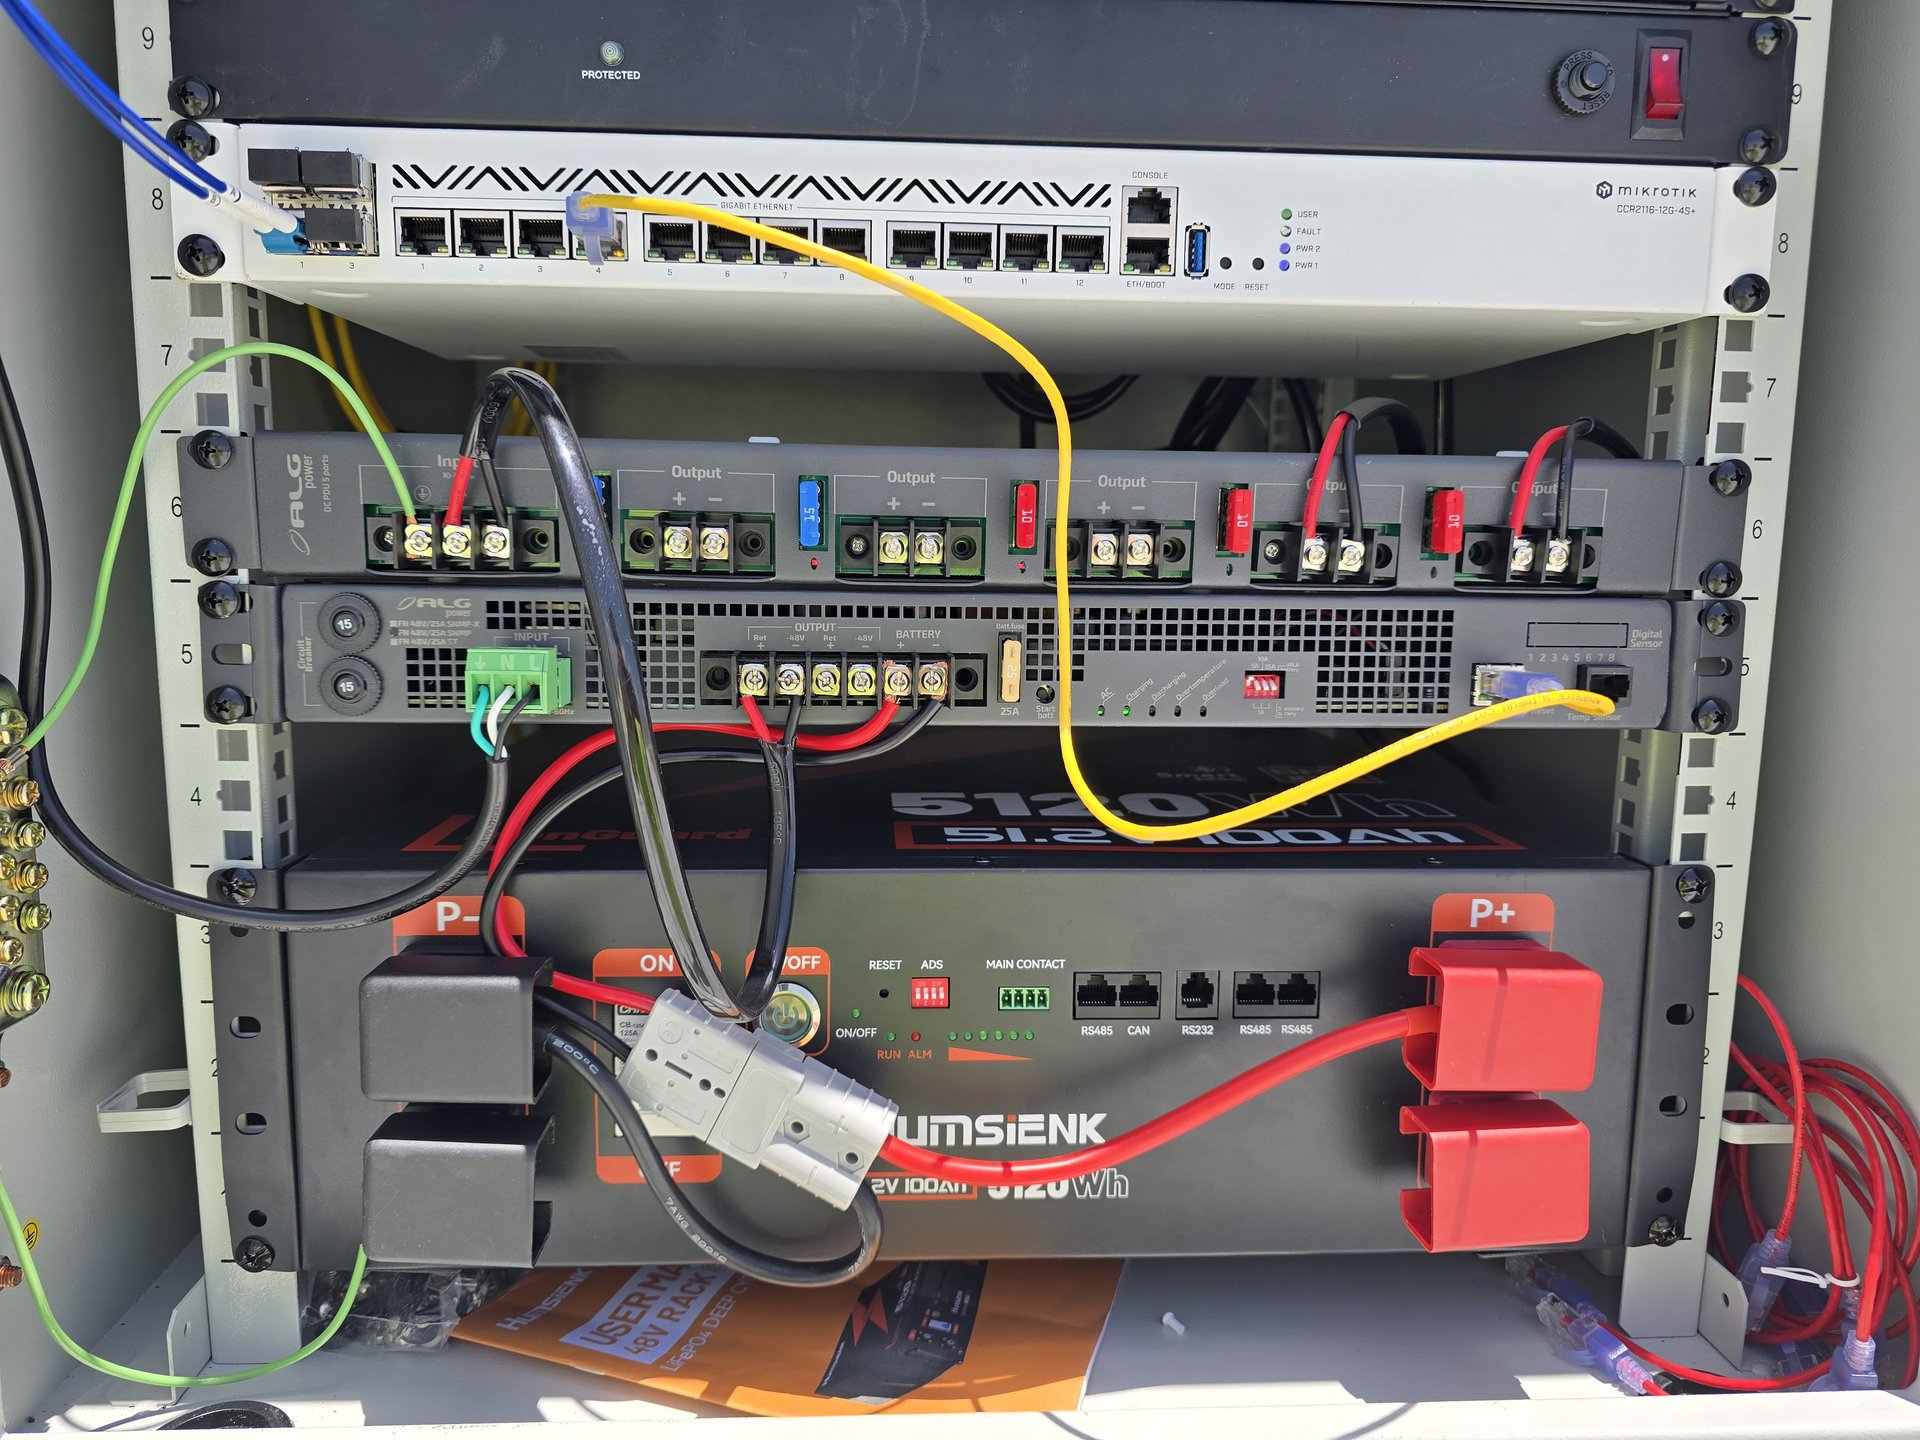
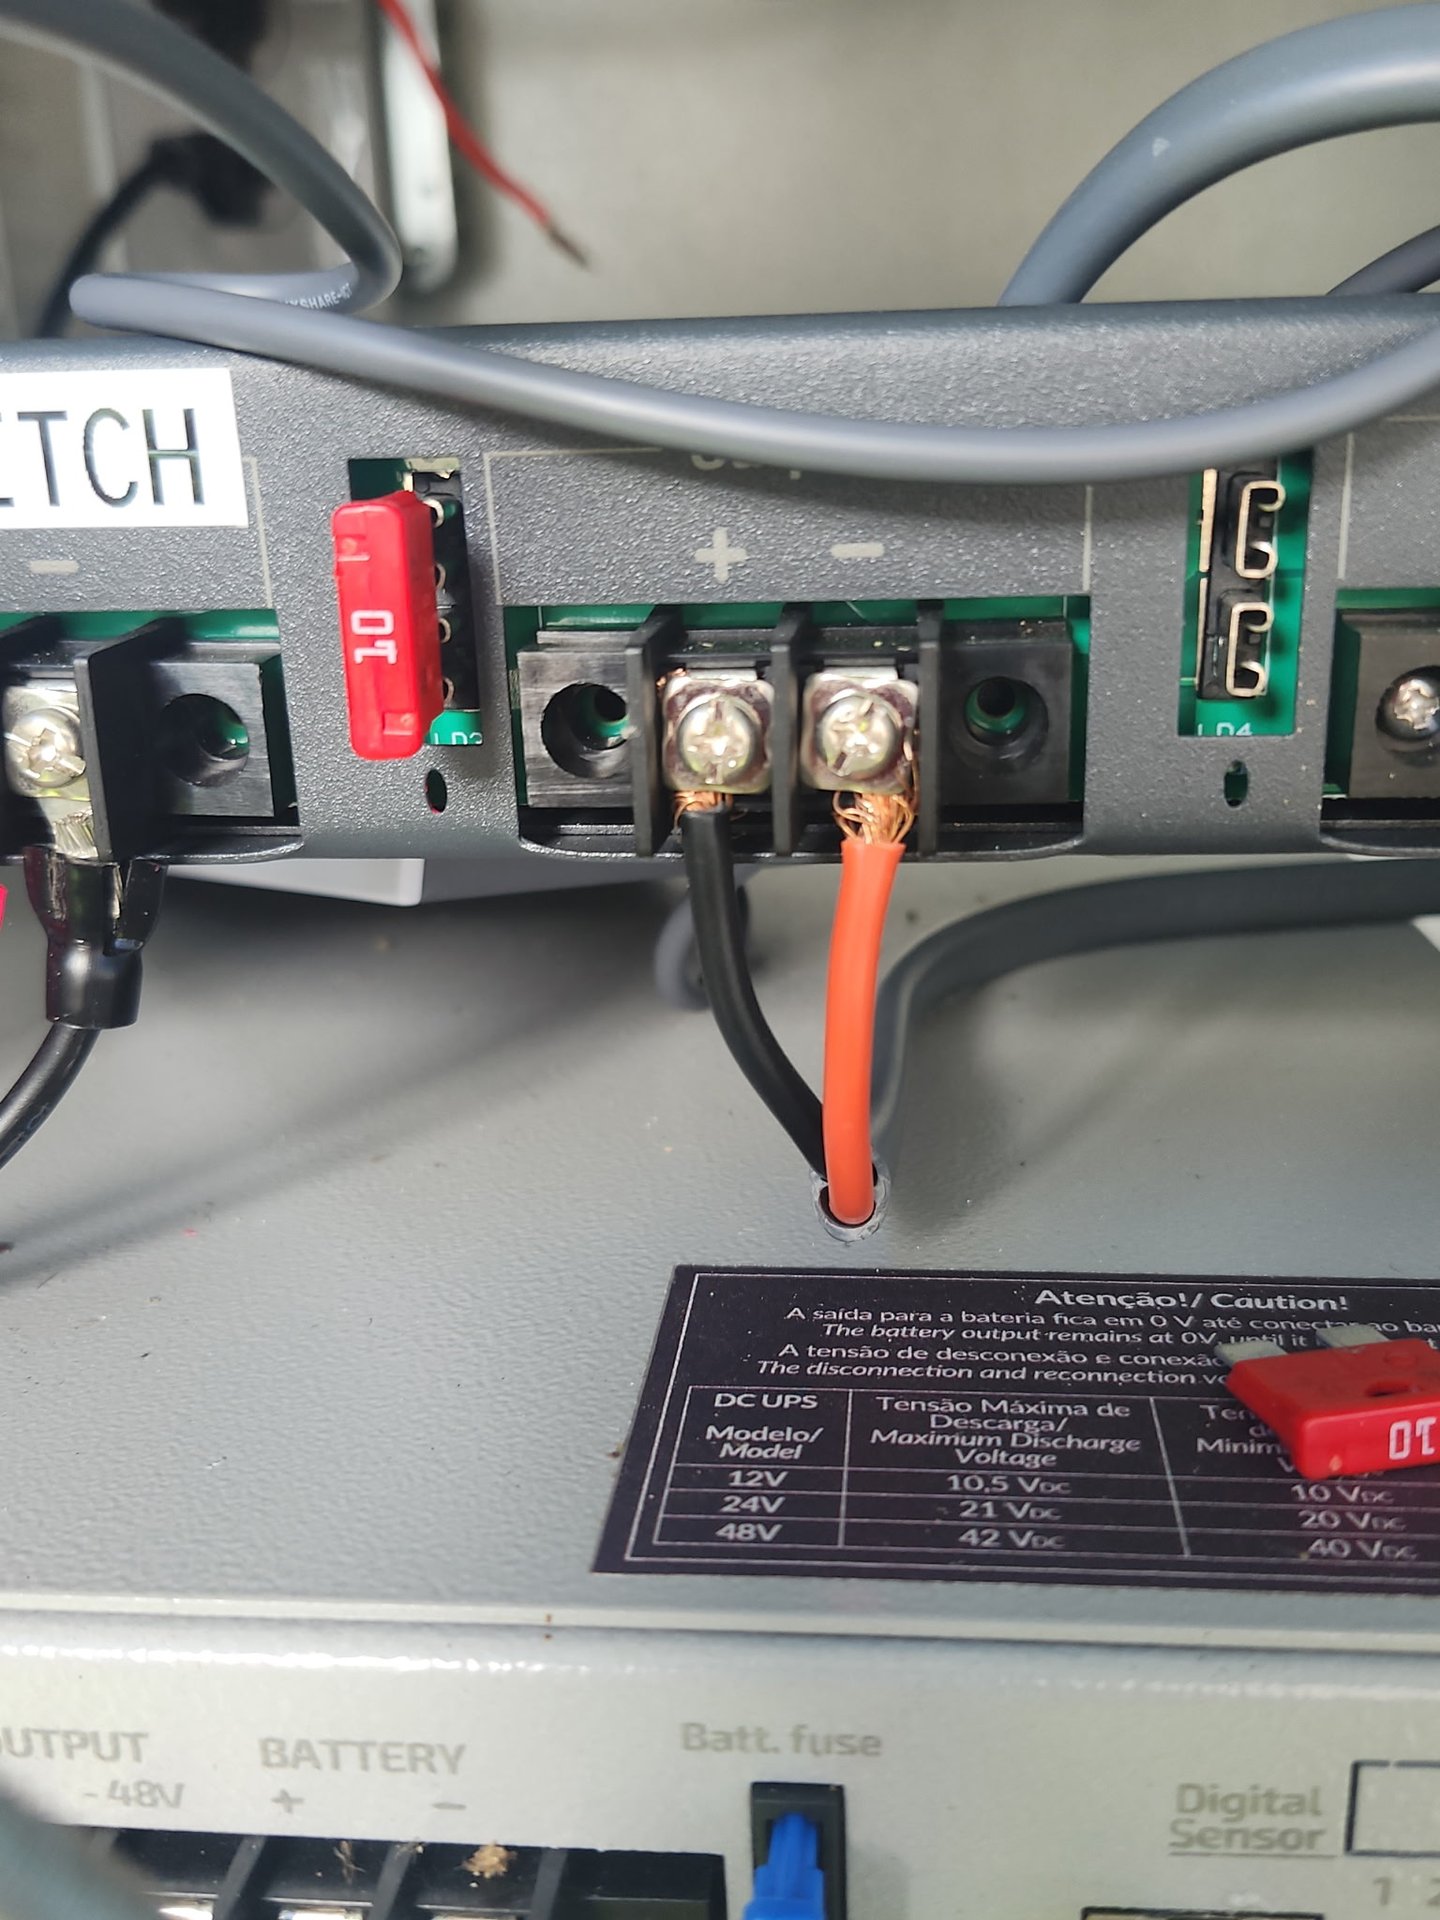
The heart of the build is a rack-mount LiFePO₄ battery and a telecom DC UPS that charges it and keeps everything up when the grid drops. Ours:
Know your battery voltage (this is where people fry things)
A "48V" or "51.2V" LiFePO₄ battery is not a steady 48V. Our Humsienk 16S pack swings across a wide range as it charges and discharges:
| Battery state | Bus voltage (16S LiFePO₄) |
|---|---|
| Discharge cutoff (BMS) | ~40V |
| Low / near empty | ~48V |
| Nominal | ~51V |
| Float / working | ~54V |
| Full charge | 57.6V |
Powering each Starlink on DC
Three common setups, three different voltage stories. Find yours.
Gen 3 — run it off the ~54V bus
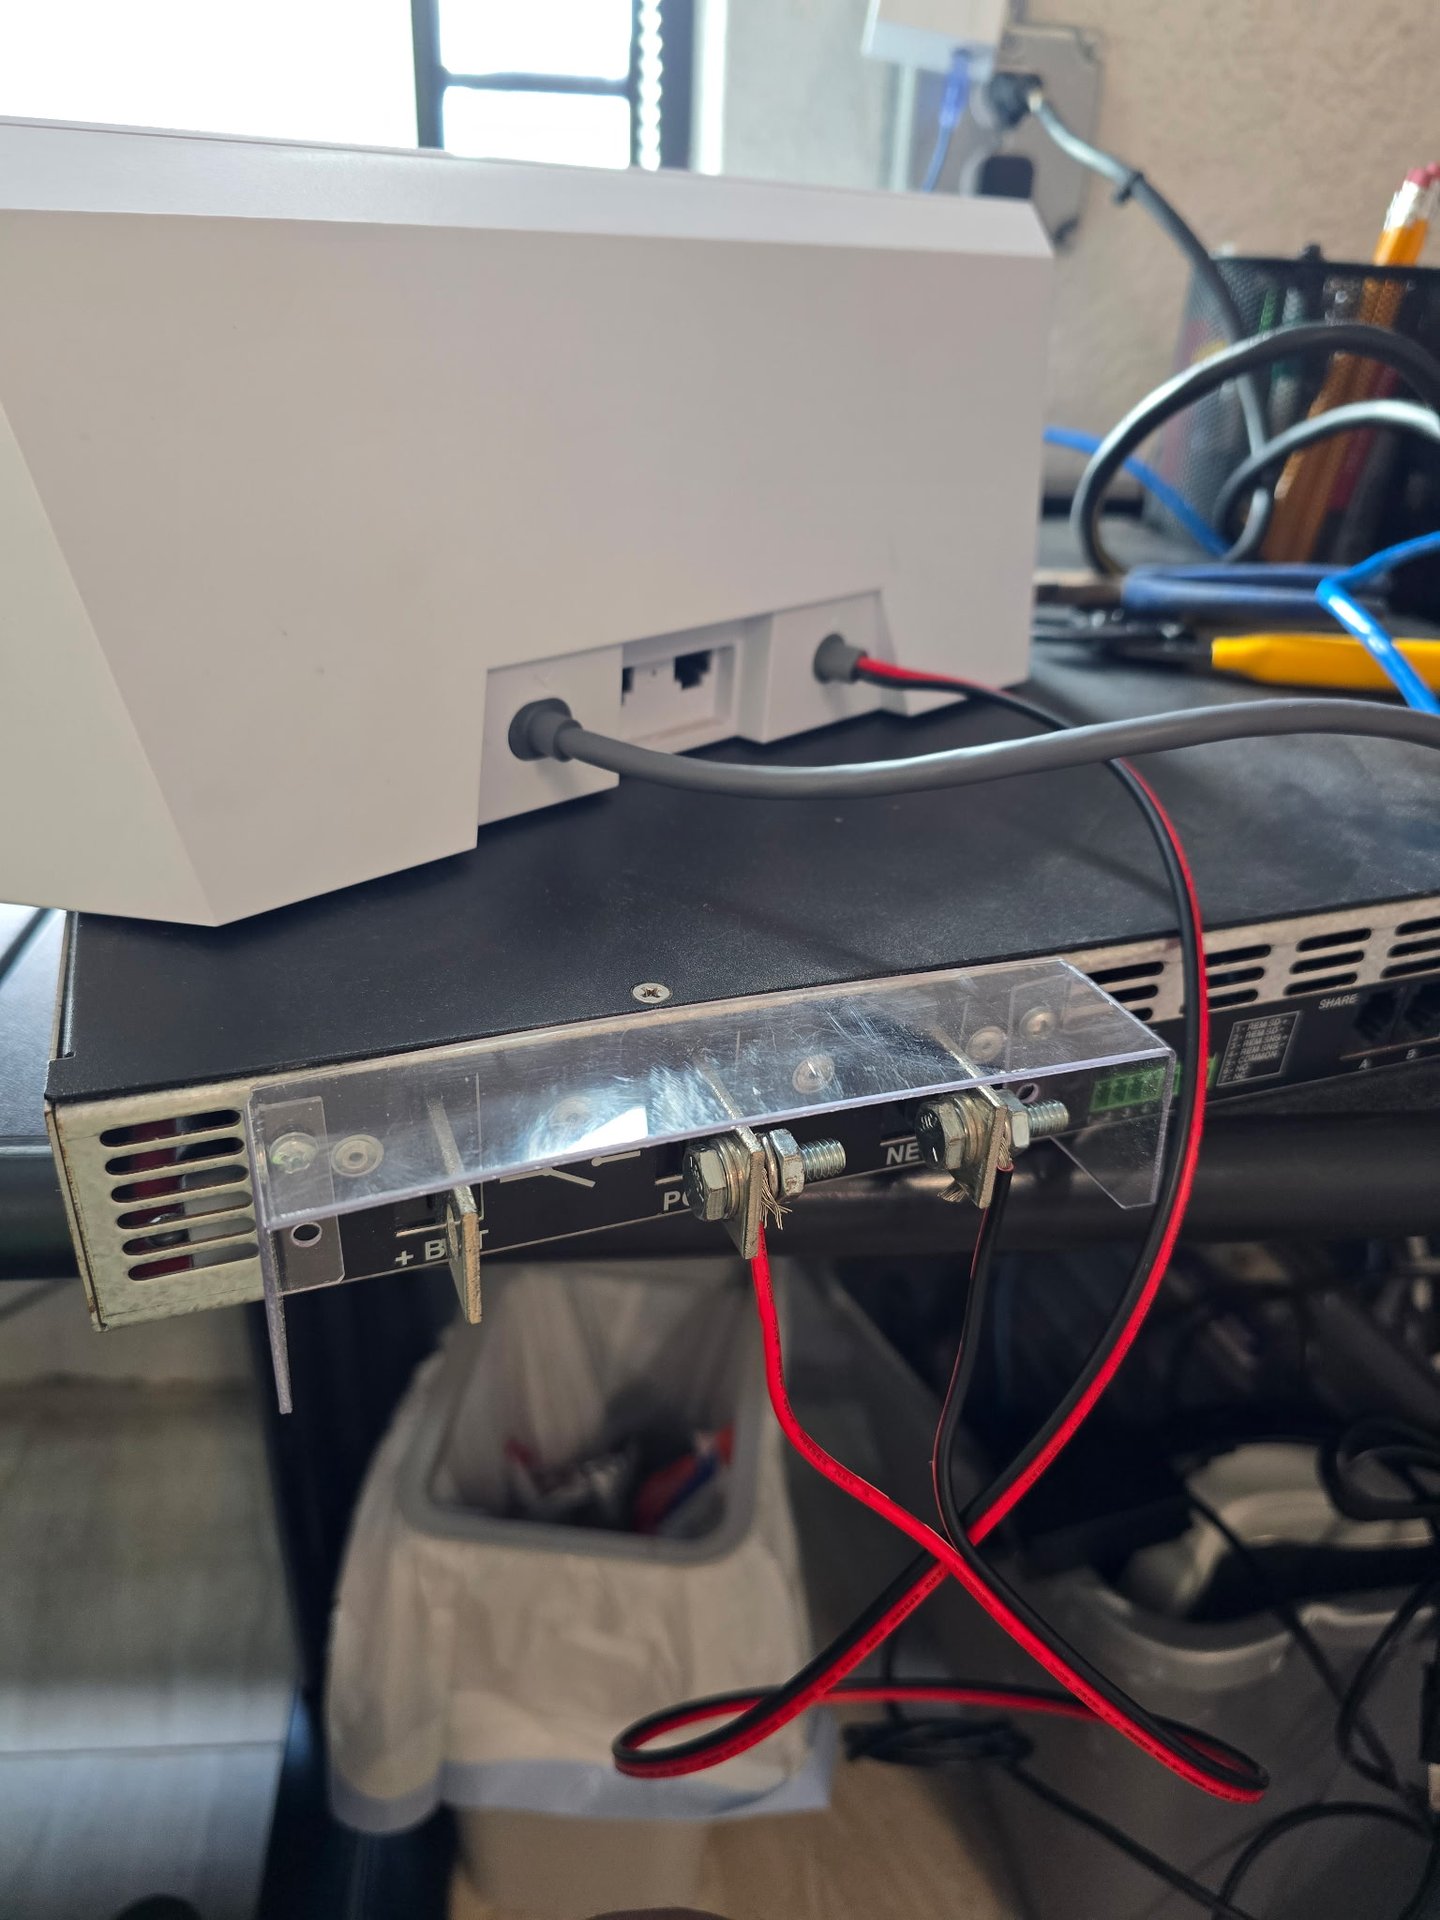
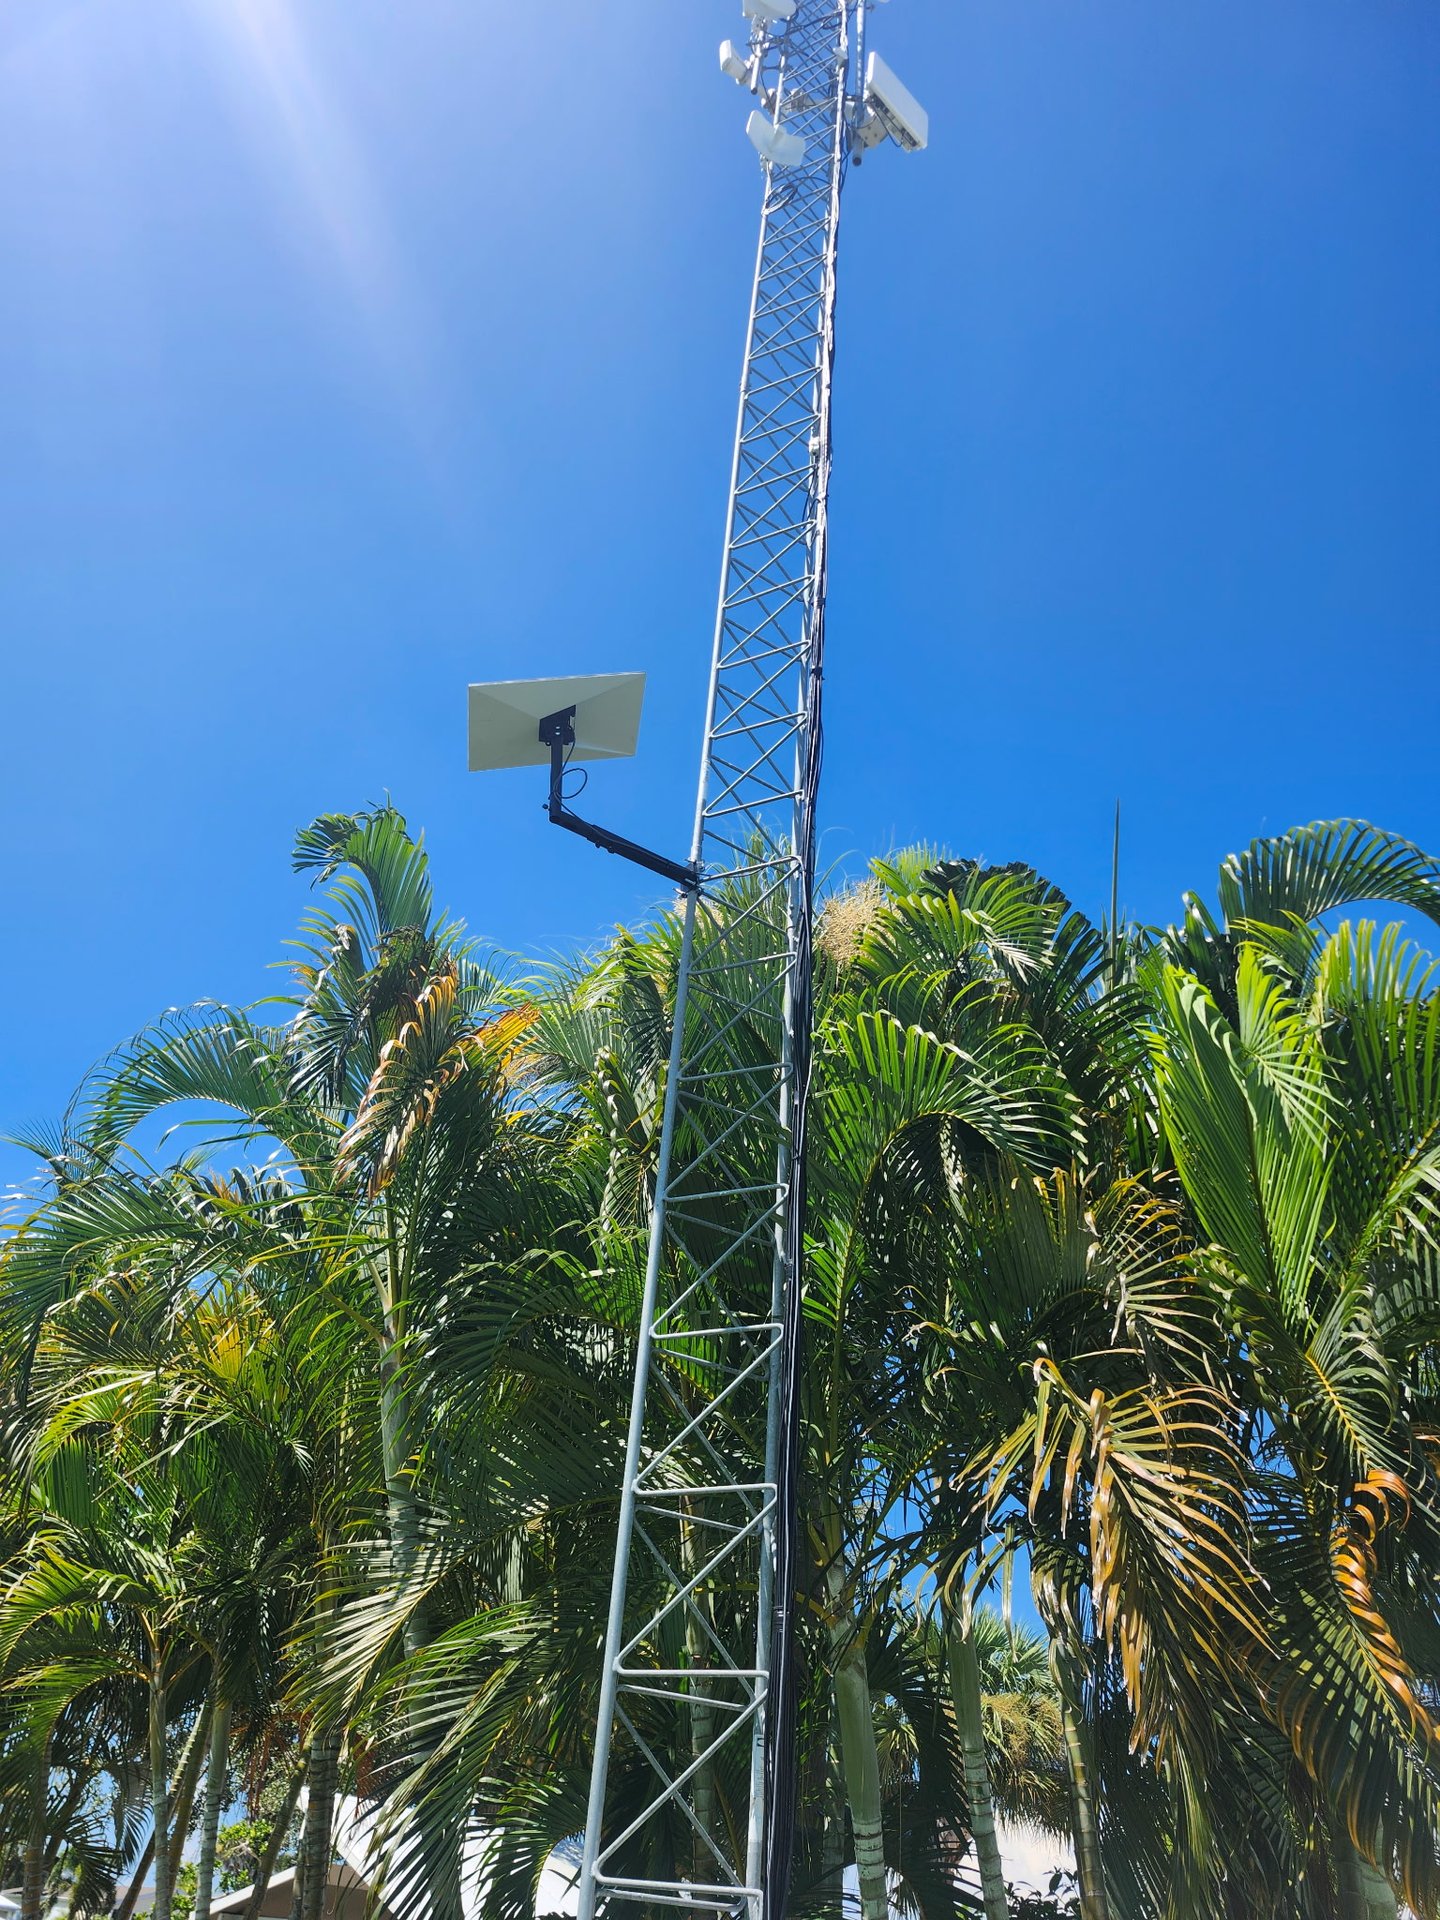
This is the tower build. The Gen 3 dish and router run directly from the ~54V LiFePO₄ bus. Starlink's 48V-rated DC gear powers up and runs fine at 54V (see the voltage note above); for a fully in-spec job, pick a converter/injector rated to 60V+. Mount the dish somewhere with a clean view of the sky.
Mini — a 12–48V barrel cable
The Mini takes 12–48V DC on its DC5521 (5.5×2.1 mm) barrel jack — center pin positive. Feed it from a 12–48V source with a proper barrel pigtail (≥14AWG so startup current doesn't drop the voltage). On a 48V/51.2V pack that floats ~54V, step down to about 36V first to stay under the Mini's 48V ceiling.
Low-voltage source — step up with the Starlink UTP-241L
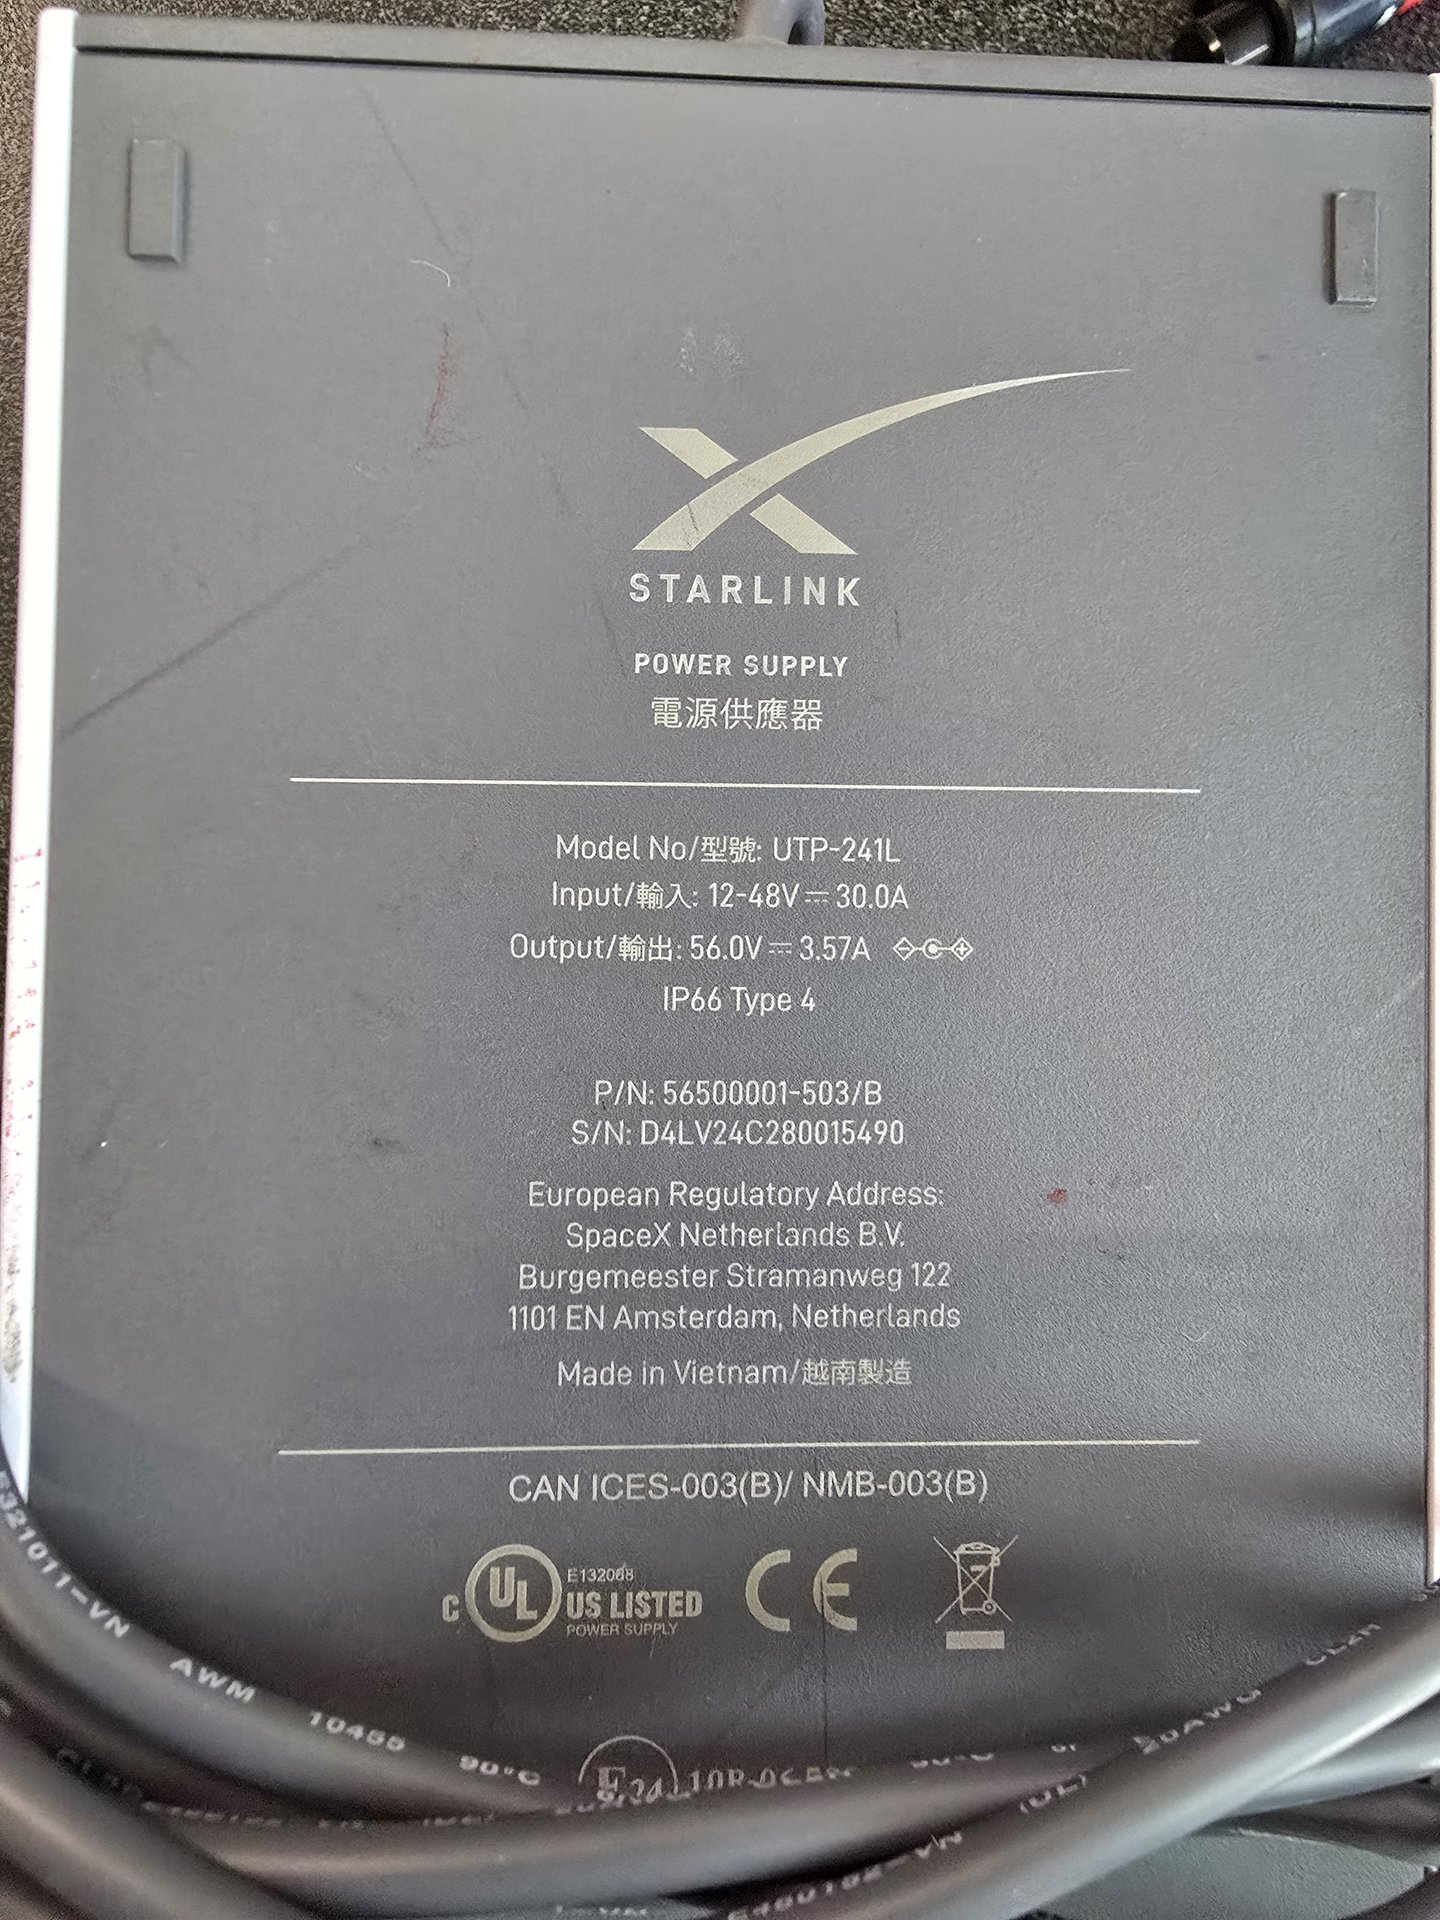
Running off a 12V or 24V battery (car, RV, small solar)? Starlink's own UTP-241L power supply is a DC-DC unit: it takes 12–48V in and puts out the 56V Starlink wants — no AC, no inverter. This is the clean choice for lower-voltage systems.
Wiring & polarity
On barrel plugs the center pin is positive (+). On a telecom plant the terminals read Ret (return / battery +) and -48V (the hot): land input + on Ret and input − on -48V. Always fuse the input on the battery side, and use ≥14AWG so voltage drop doesn't starve the dish on startup.
Tower-site example
Starlink pressed into service as backhaul on a wireless tower, powered from the site's battery plant instead of mains — so the link stays up when the grid doesn't.
Parts we used
- Humsienk 48V 100Ah LiFePO₄ battery — 51.2V, 5.12kWh, 16S, rack-mount, Bluetooth/BMS.
View the battery → - ALGcom FN-4800/25-SNMP DC UPS — 48V / 25A rectifier + charger + backup, SNMP.
View the DC UPS → - Starlink Gen 3 mount — 360° adjustable telescoping wall/pole mount (Standard / 4 / 4X / Gen 3).
View the mount → - Starlink Mini DC5521 power cable — 5.5×2.1mm barrel to bare wire, 14AWG.
View the cable →
Some links above may be affiliate links; we only link to gear used in this build.
Setting up Starlink? Grab a free month.
Ordering a new Starlink for your off-grid or tower project? New customers get one month of service free through our referral — applied to the second month.
See the Free-Month Offer →FAQ
Can I power a Starlink Gen 3 from a 48V LiFePO₄ battery?
Yes. A 48V/51.2V LiFePO₄ plant runs around 54V, and Starlink's 48V-rated DC gear powers up and runs the Gen 3 router and dish at 54V. For a fully in-spec install, use gear rated for a higher input (60V+).
How do I power a Starlink Mini on DC?
The Mini takes 12–48V DC on its DC5521 (5.5×2.1mm) barrel jack. Use a barrel power cable from a 12–48V source; on a 48V/54V pack, step down to about 36V first.
How do I run Starlink off a 12V car or RV battery?
Use the Starlink UTP-241L power supply, which accepts 12–48V DC and steps it up to the 56V Starlink needs.
How much power does Starlink use on DC?
A Mini averages ~17–40W (~60W at startup). A Gen 3 runs ~75–100W, with heater surges past 180W in cold, wet weather.
Does bypassing the power supply void the warranty?
Modifying the power path is done at your own risk and can affect warranty coverage. This guide is informational — verify every voltage with a meter.